Imagine this—you’re chilling on your couch, sipping coffee, while your Raspberry Pi is tucked away in another room or even miles away. How do you access it without physically touching it? That’s where remote login to Raspberry Pi comes in, and trust me, it’s a game-changer. Whether you’re a tech enthusiast, a developer, or just someone curious about tinkering with Raspberry Pi, this guide will walk you through everything you need to know about remote logins. From setting it up to troubleshooting common issues, we’ve got you covered!
Now, let’s be real—Raspberry Pi has become a staple for DIY projects, home automation, and even professional setups. But what happens when you can’t be physically present to interact with your Pi? That’s where remote access shines. It allows you to control your Pi from anywhere, making it super convenient for managing servers, monitoring devices, or simply debugging code.
Before we dive into the nitty-gritty, let’s clear something up. Remote login isn’t just some fancy buzzword; it’s a practical solution for anyone who wants to maximize their Raspberry Pi’s potential. So, whether you’re a beginner or an advanced user, buckle up because we’re about to take you on a journey filled with tips, tricks, and some good ol’ tech talk.
Read also:Mastering Remote Iot Vpc Ssh Download On Windows 10 Your Ultimate Guide
What is Remote Login to Raspberry Pi?
Let’s break it down—remote login to Raspberry Pi means accessing your Pi’s terminal or desktop interface from another computer or device without needing to be physically present. It’s like giving your Pi a virtual hug from afar. This process uses protocols like SSH (Secure Shell) or VNC (Virtual Network Computing) to establish a secure connection between your devices.
SSH is like the Swiss Army knife of remote access. It’s lightweight, secure, and perfect for executing commands or transferring files. On the other hand, VNC lets you access the graphical desktop interface, which is ideal if you’re working on GUI-based applications. Both methods have their strengths, and we’ll explore them in detail as we move forward.
Why Should You Use Remote Login for Raspberry Pi?
Here’s the thing—remote login isn’t just convenient; it’s essential for many use cases. Imagine running a weather station, a home server, or even a media center. You don’t want to haul your Pi around every time you need to check its status. With remote login, you can monitor and manage your Pi from anywhere, saving time and effort.
Plus, it’s a lifesaver for troubleshooting. Ever faced a situation where your Pi won’t boot up properly? Remote access lets you diagnose and fix issues without being physically present. It’s like having a remote control for your tech setup. And let’s not forget the security benefits—SSH encrypts your connection, ensuring that your data stays safe from prying eyes.
Setting Up SSH for Remote Login
SSH is the go-to method for most Raspberry Pi users, and setting it up is a breeze. Here’s how you do it:
First, make sure your Raspberry Pi is running the latest version of Raspberry Pi OS. Then, open the terminal and type sudo raspi-config. Navigate to “Interfacing Options” and enable SSH. That’s it—you’re ready to roll! Now, grab your Pi’s IP address by typing hostname -I in the terminal.
Read also:Is Salt Trick For Men Real The Ultimate Truth About This Viral Sensation
From your remote computer, open your SSH client (like PuTTY for Windows or the built-in terminal for macOS and Linux). Enter your Pi’s IP address, log in with your credentials, and voilà—you’re connected! Simple, right?
Tips for Secure SSH Connections
Security should always be a top priority when using SSH. Here are a few tips to keep your connection safe:
- Change the default password for the “pi” user to something strong and unique.
- Disable password authentication and switch to SSH keys for added security.
- Use a firewall to restrict access to your Pi’s SSH port (default is 22).
- Consider changing the default SSH port to something less obvious.
By following these steps, you’ll significantly reduce the risk of unauthorized access to your Pi.
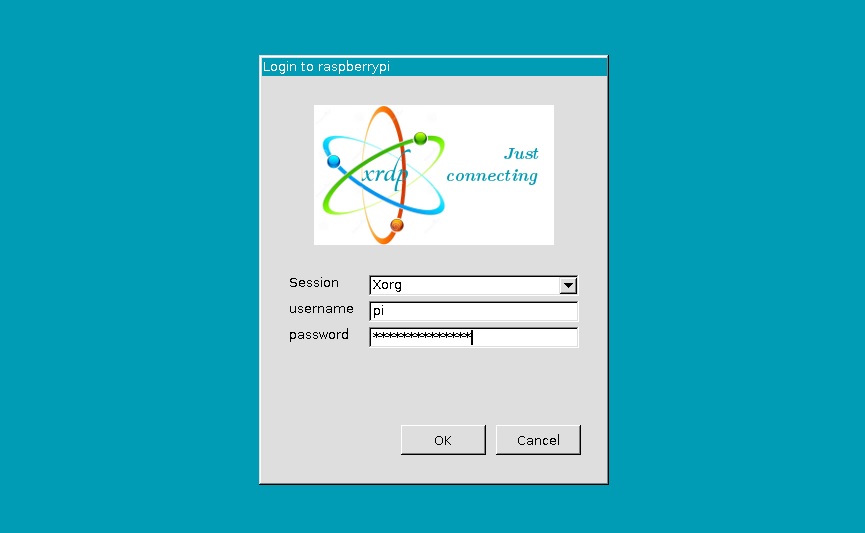
Exploring VNC for Graphical Remote Access
If you prefer a more visual approach, VNC is the way to go. It allows you to access your Pi’s desktop interface remotely, making it perfect for tasks that require a graphical environment. Setting up VNC is straightforward—just enable it in raspi-config like you did with SSH.
Once enabled, download the VNC Viewer app on your remote device. Enter your Pi’s IP address, log in with your credentials, and you’ll be greeted with your Pi’s desktop in all its glory. It’s like sitting right in front of your Pi, but from the comfort of your couch.
Optimizing VNC Performance
VNC can sometimes feel a bit sluggish, especially over slower internet connections. Here’s how to optimize its performance:
- Lower the screen resolution on your Pi to reduce the amount of data being transmitted.
- Disable unnecessary desktop effects or animations.
- Use a wired connection instead of Wi-Fi for better stability.
With these tweaks, you’ll enjoy a smoother VNC experience, even over less-than-ideal connections.
Common Issues and Troubleshooting
Let’s face it—things don’t always go as planned. If you’re having trouble with remote login, here are a few common issues and how to fix them:
- “Connection Refused” Error: Double-check that SSH or VNC is enabled on your Pi and that your firewall isn’t blocking the connection.
- Wrong IP Address: Reboot your Pi and re-check its IP address using
hostname -I. - Authentication Failed: Ensure you’re using the correct username and password. If you’ve set up SSH keys, make sure they’re properly configured.
If none of these solutions work, try resetting your Pi’s network settings or reinstalling the SSH/VNC service. Persistence is key!
Advanced Techniques for Remote Login
Once you’ve mastered the basics, it’s time to level up your remote login skills. Here are a few advanced techniques to explore:
Port Forwarding for Remote Access
If you want to access your Pi from outside your local network, port forwarding is your best friend. It allows you to map a port on your router to your Pi’s SSH or VNC port, enabling remote access over the internet. Just be sure to secure your connection with strong passwords and firewalls to prevent unauthorized access.
Using Dynamic DNS
Static IP addresses are great, but not everyone has access to them. That’s where Dynamic DNS (DDNS) comes in. Services like No-IP or DuckDNS assign a fixed domain name to your Pi, even if its IP address changes. This makes remote access a breeze, no matter where you are.
Best Practices for Remote Login
To ensure a smooth and secure remote login experience, follow these best practices:
- Always keep your Raspberry Pi OS and software up to date.
- Regularly change your passwords and review your security settings.
- Limit the number of devices that can access your Pi remotely.
- Document your setup process for future reference.
By adhering to these guidelines, you’ll create a robust and secure remote login setup that you can rely on.
Real-World Applications of Remote Login
Now that you know how to set up remote login, let’s talk about some cool applications:
Home Automation
Use your Raspberry Pi as the brain of your smart home system. With remote login, you can monitor and control your devices from anywhere, ensuring your home is always running smoothly.
Web Hosting
Set up a web server on your Pi and manage it remotely. Whether you’re hosting a personal blog or a small business website, remote login gives you the flexibility to make updates and troubleshoot issues without being physically present.
Media Center
Turn your Pi into a media center and stream your favorite movies and music. With remote login, you can add or remove content, update software, and tweak settings from the comfort of your couch.
Conclusion
Remote login to Raspberry Pi is a powerful tool that opens up a world of possibilities for tech enthusiasts and professionals alike. From SSH to VNC, there are plenty of methods to choose from, each with its own strengths and use cases. By following the tips and techniques outlined in this guide, you’ll be able to set up a secure and efficient remote login system in no time.
So, what are you waiting for? Grab your Pi, fire up your terminal, and start exploring the wonders of remote login. And don’t forget to share your experiences and tips in the comments below. Happy hacking!
Table of Contents
- What is Remote Login to Raspberry Pi?
- Why Should You Use Remote Login for Raspberry Pi?
- Setting Up SSH for Remote Login
- Tips for Secure SSH Connections
- Exploring VNC for Graphical Remote Access
- Optimizing VNC Performance
- Common Issues and Troubleshooting
- Advanced Techniques for Remote Login
- Best Practices for Remote Login
- Real-World Applications of Remote Login