Imagine this: you're sitting in your cozy living room, sipping coffee, while managing an IoT device located miles away. How do you make it happen without losing your mind or compromising security? Enter SSH – the superhero of remote connections. In this guide, we'll dive deep into remote IoT device SSH examples, helping you master the art of secure communication.
Nowadays, the Internet of Things (IoT) is everywhere, from smart homes to industrial automation. But here's the kicker – managing these devices remotely isn't as simple as downloading an app. You need a secure, reliable way to connect, and SSH is your golden ticket. Whether you're a tech enthusiast or a professional, this guide will walk you through everything you need to know.
So, buckle up! We’re about to take you on a journey through the world of remote IoT device management. By the end of this article, you'll be equipped with practical examples, tips, and tricks to get started with SSH. Let's make it happen!
Read also:Temporary Replacement 3 Hyungry A Dive Into The Hottest Trend In Korean Food Scene
Table of Contents
- What is SSH?
- Why Use SSH for IoT Devices?
- A Brief Biography of SSH
- Setting Up SSH on Your IoT Device
- Connecting to a Remote IoT Device
- Security Best Practices for SSH
- Troubleshooting Common SSH Issues
- Remote IoT Device SSH Example Scenarios
- Tools and Software for SSH Management
- Wrapping It Up
What is SSH?
SSH, or Secure Shell, is like the Swiss Army knife of network tools. It’s a protocol designed to let you securely connect to a remote device over an unsecured network. Think of it as a private tunnel that keeps your data safe from prying eyes. SSH not only allows you to manage devices remotely but also encrypts all communication between your computer and the target device.
When it comes to IoT devices, SSH is a game-changer. Whether you're debugging a sensor or updating firmware, having SSH at your disposal ensures that you can do it all without compromising security. Plus, it’s open-source, meaning there’s a whole community out there constantly improving it.
SSH in a Nutshell
- Secure communication protocol.
- Encrypted data transfer.
- Used for remote device management.
- Perfect for IoT applications.
Why Use SSH for IoT Devices?
Here’s the deal: IoT devices are often deployed in remote locations, making physical access a nightmare. That’s where SSH shines. It allows you to connect to these devices from anywhere in the world, as long as you have an internet connection. But wait, there’s more!
SSH offers several advantages for IoT devices:
- Security: SSH encrypts all data exchanged between your computer and the IoT device, making it nearly impossible for hackers to intercept sensitive information.
- Reliability: Unlike other protocols, SSH is incredibly stable, ensuring that your connection remains intact even in less-than-ideal network conditions.
- Flexibility: SSH can be used for a variety of tasks, from executing commands to transferring files, making it a versatile tool for IoT management.
A Brief Biography of SSH
SSH wasn’t always the powerhouse it is today. It was first developed in the mid-1990s by Tatu Ylönen, a Finnish computer scientist who wanted a secure way to log into remote servers. Since then, it’s evolved into the protocol we know and love.
Today, SSH is the go-to solution for remote device management, especially in the IoT space. Its widespread adoption is a testament to its effectiveness and reliability. Below is a quick overview of SSH’s history:
Read also:What Is The Blue Salt Trick For Men Unlocking The Secrets To Virility And Stamina
| Year | Milestone |
|---|---|
| 1995 | SSH 1.0 released by Tatu Ylönen. |
| 1999 | SSH 2.0 introduced, offering improved security features. |
| 2006 | OpenSSH becomes the standard implementation for Unix-based systems. |
| 2023 | SSH remains a cornerstone of secure remote access, including IoT applications. |
Setting Up SSH on Your IoT Device
Alright, let’s get our hands dirty. Setting up SSH on an IoT device isn’t rocket science, but it does require a bit of know-how. Here’s a step-by-step guide to help you get started:
Step 1: Enable SSH on Your Device
Most IoT devices come with SSH pre-installed, but it might be disabled by default. Check your device’s documentation to find out how to enable it. For example, on a Raspberry Pi, you can enable SSH by running the following command:
sudo raspi-config
Then, navigate to "Interfacing Options" and select "SSH" to enable it.
Step 2: Assign a Static IP Address
Having a static IP address makes it easier to connect to your device. You can set this up in your router’s settings or by configuring it directly on the device.
Step 3: Test the Connection
Once SSH is enabled and your device has a static IP, test the connection by running:
ssh username@ip_address
If everything is set up correctly, you should be prompted to enter your password.
Connecting to a Remote IoT Device
Connecting to a remote IoT device via SSH involves a few extra steps, but it’s totally doable. Here’s how you can make it happen:
Step 1: Set Up Port Forwarding
If your IoT device is behind a router, you’ll need to set up port forwarding. This allows external connections to reach your device. Typically, you’ll forward port 22 (the default SSH port) to your device’s internal IP address.
Step 2: Use a Dynamic DNS Service
Your home internet connection likely has a dynamic IP address, which can change from time to time. To avoid headaches, use a dynamic DNS (DDNS) service that assigns a fixed domain name to your IP address.
Step 3: Connect Using SSH
With port forwarding and DDNS set up, you can now connect to your device using:
ssh username@your_domain_name
And just like that, you’re in!
Security Best Practices for SSH
Security is paramount when it comes to remote IoT device management. Here are some best practices to keep your SSH connections safe:
- Use Strong Passwords: Avoid using common passwords like "123456" or "password." Opt for something complex and unique.
- Enable Key-Based Authentication: Instead of relying on passwords, use SSH keys for added security.
- Change the Default Port: Moving SSH off port 22 can deter automated attacks.
- Keep Software Updated: Regularly update your device’s firmware and SSH software to patch vulnerabilities.
Troubleshooting Common SSH Issues
Even the best-laid plans can go awry. Here are some common SSH issues and how to fix them:
Issue 1: Connection Refused
If you’re getting a "Connection refused" error, double-check that SSH is enabled on your device and that port forwarding is set up correctly.
Issue 2: Permission Denied
This usually happens when there’s a problem with your username, password, or SSH keys. Verify that you’re using the correct credentials and that your keys are properly configured.
Issue 3: Timeout Errors
Timeouts can occur if your device’s IP address has changed or if there’s a network issue. Make sure your DDNS service is working correctly and that your router is configured properly.
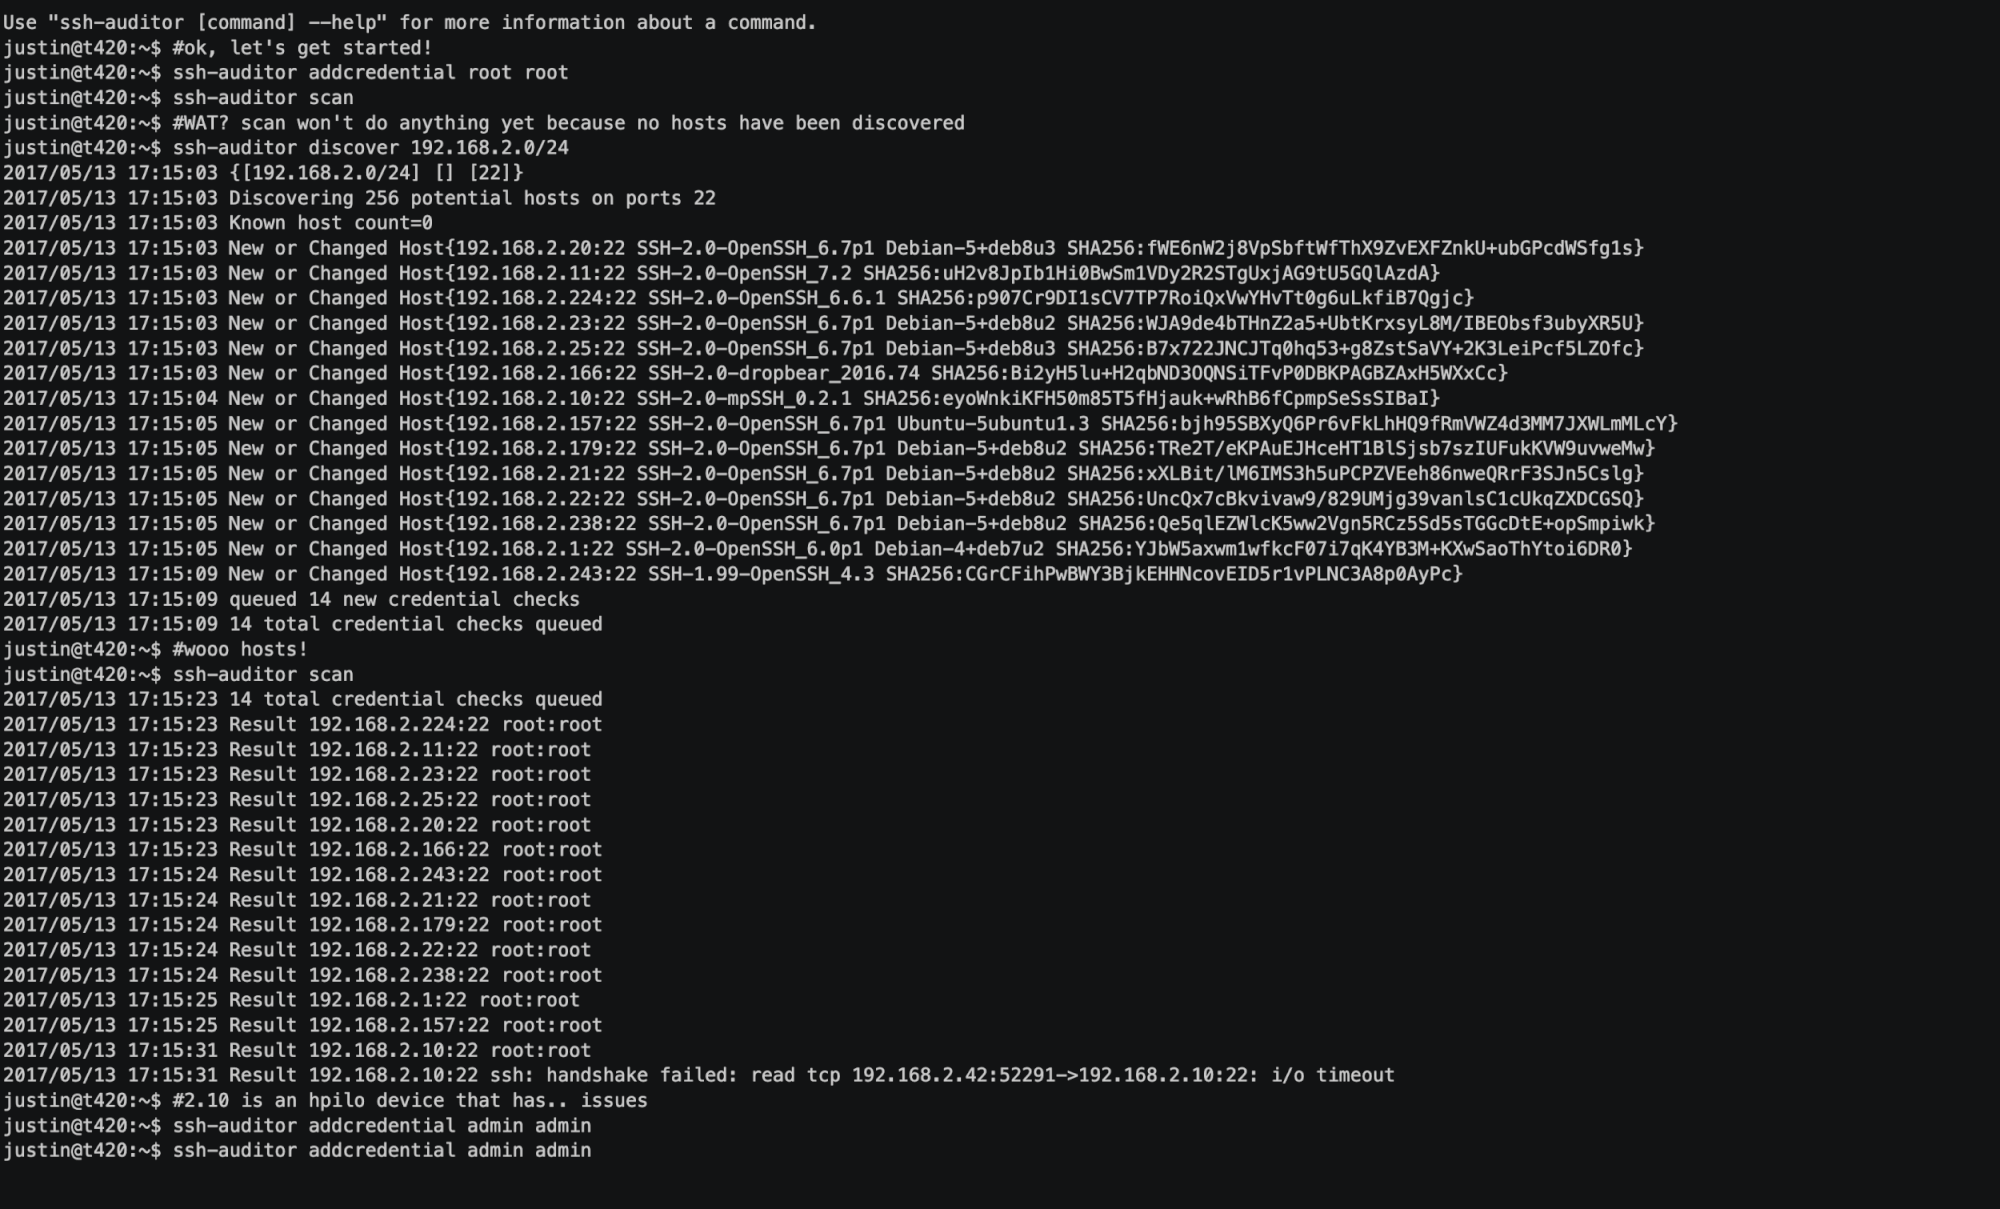
Remote IoT Device SSH Example Scenarios
Let’s put theory into practice with some real-world examples:
Example 1: Updating Firmware
Imagine you have a remote weather station powered by an IoT device. You can use SSH to log into the device and update its firmware without ever leaving your desk:
ssh username@weather_station_ip
sudo apt update && sudo apt upgrade
Example 2: Debugging Sensors
Encountering issues with your IoT sensors? SSH to the rescue! You can connect to the device and run diagnostic commands to identify and fix problems.
Example 3: File Transfer
Need to transfer files to or from your IoT device? Use SCP (Secure Copy Protocol), which is built into SSH:
scp /path/to/local/file username@remote_device:/path/to/remote/directory
Tools and Software for SSH Management
There’s no shortage of tools to help you manage SSH connections. Here are a few worth checking out:
- PuTTY: A popular SSH client for Windows users.
- OpenSSH: The go-to solution for Unix-based systems.
- MobaXterm: A powerful tool that combines an SSH client with a terminal emulator.
Wrapping It Up
There you have it – your ultimate guide to remote IoT device SSH examples. From setting up SSH on your device to troubleshooting common issues, we’ve covered everything you need to know. Remember, security should always be your top priority, so follow those best practices religiously.
Now it’s your turn! Put this knowledge to use and start managing your IoT devices like a pro. And don’t forget to share this article with your friends and colleagues – the more the merrier! If you have any questions or feedback, drop a comment below. Let’s keep the conversation going!