Let’s cut to the chase, folks. If you’re here, you’re likely neck-deep in the world of Raspberry Pi and VNC setups. And trust me, there’s nothing cooler than getting your Pi secure, especially when it comes to VNC host.allow configurations. But why stop at just setting it up? Let’s dive deep into making it rock-solid secure. Because, let’s face it, in today’s digital jungle, security isn’t optional—it’s essential.
You might be asking yourself, “Why should I care about Raspberry Pi secure VNC host.allow?” Well, my friend, think of it like locking your front door when you leave the house. Sure, your house might still be standing, but why take the risk of someone waltzing in uninvited? The same goes for your Pi. Without proper VNC security, you’re practically rolling out the red carpet for hackers and unwanted guests.
Now, before we jump into the nitty-gritty, let’s get something straight. This isn’t just another tech article filled with jargon that’ll make your head spin. We’re going to break it down step by step, making sure you understand every piece of the puzzle. By the end of this, you’ll be a Raspberry Pi secure VNC wizard, ready to take on any challenge that comes your way. So, buckle up and let’s get started!
Read also:Sarah Elisabeth Coyne The Rising Star Redefining Success
What Exactly is Raspberry Pi Secure VNC?
Alright, let’s level-set. Raspberry Pi secure VNC is essentially the process of setting up your Raspberry Pi to allow remote access while keeping it as secure as Fort Knox. VNC, or Virtual Network Computing, is a graphical desktop sharing system that lets you remotely control another computer. But here’s the kicker—it’s not secure out of the box. That’s where the “secure” part comes in.
Think of it like this: you’ve got a shiny new car, but the doors don’t lock. Sure, it’s cool to have, but it’s also an invitation for trouble. The same applies to your Raspberry Pi. Without proper security measures, you’re leaving yourself wide open to potential threats. And trust me, there are plenty of bad actors out there looking for vulnerabilities to exploit.
Why Should You Care About VNC host.allow?
Here’s the deal—VNC host.allow is like your bouncer at a club. It decides who gets in and who stays out. By configuring your host.allow file correctly, you’re essentially creating a whitelist of trusted IPs that can access your Raspberry Pi via VNC. This means that even if someone manages to find your VNC server, they won’t be able to connect unless they’re on the list.
But wait, there’s more. Properly setting up VNC host.allow isn’t just about keeping the bad guys out. It’s also about ensuring that only the people you trust have access to your system. Whether it’s for personal use or a business setup, having a secure VNC configuration is crucial for maintaining the integrity of your data and systems.
Step-by-Step Guide to Securing Your VNC Setup
Now that we’ve covered the basics, let’s dive into the actual steps you need to take to secure your VNC setup. Here’s a quick rundown of what we’ll be covering:
- Updating your Raspberry Pi
- Installing VNC Server
- Configuring VNC host.allow
- Setting up SSH for remote access
- Enabling firewalls
Let’s break it down one step at a time.
Read also:Meacutelanie Joly And Justin Trudeau Relationship A Deep Dive Into Canadas Political Power Couple
1. Update Your Raspberry Pi
First things first, you need to make sure your Raspberry Pi is up to date. This ensures that you’re running the latest software and security patches. Here’s how you do it:
Open up your terminal and run the following commands:
sudo apt update && sudo apt upgrade -y
This will update your package lists and upgrade any outdated packages. Simple, right?
2. Install VNC Server
Next up, you’ll need to install the VNC server on your Raspberry Pi. There are a few options out there, but for this guide, we’ll be using RealVNC, which is the official VNC client for Raspberry Pi.
To install RealVNC, run the following command:
sudo apt install realvnc-vnc-server realvnc-vnc-viewer
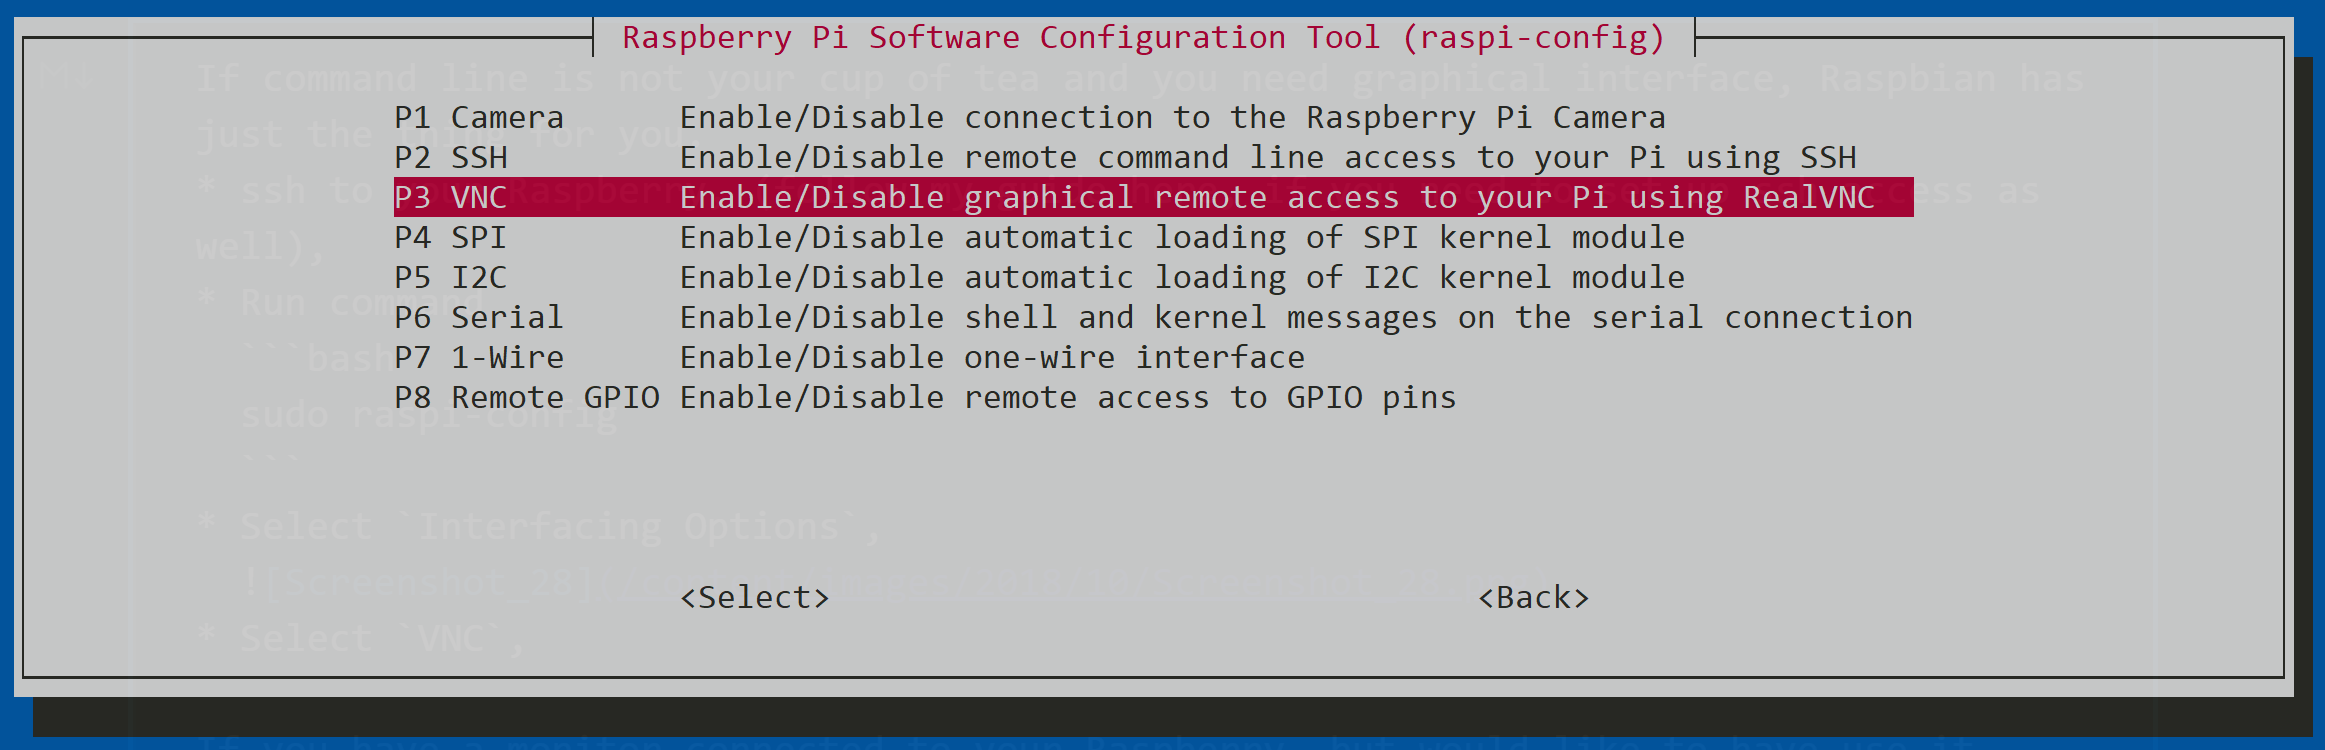
Once the installation is complete, you’ll need to enable the VNC server. You can do this by going to the Raspberry Pi Configuration tool:
sudo raspi-config
From there, navigate to Interfacing Options > VNC and enable it.
3. Configure VNC host.allow
Now we get to the heart of the matter—configuring VNC host.allow. This file controls which IP addresses are allowed to connect to your VNC server. Here’s how you do it:
First, open up the host.allow file in a text editor:
sudo nano /etc/hosts.allow
In this file, you’ll want to add the IP addresses of the devices you trust. For example:
vncserver: 192.168.1.100
This allows the device with the IP address 192.168.1.100 to connect to your VNC server. You can add as many IP addresses as you need, separated by commas.
4. Set Up SSH for Remote Access
While VNC is great for graphical access, sometimes you just need a good old-fashioned terminal session. That’s where SSH comes in. Enabling SSH on your Raspberry Pi allows you to remotely access it via the command line.
To enable SSH, simply run:
sudo raspi-config
From there, navigate to Interfacing Options > SSH and enable it. Once enabled, you can connect to your Raspberry Pi from any device using an SSH client like PuTTY.
5. Enable Firewalls
Lastly, you’ll want to enable firewalls to add an extra layer of security. The easiest way to do this is by using ufw, the uncomplicated firewall. Here’s how you set it up:
sudo apt install ufw
Once installed, you’ll want to allow SSH and VNC traffic:
sudo ufw allow ssh
sudo ufw allow 5900
Finally, enable the firewall:
sudo ufw enable
Advanced Security Tips for Raspberry Pi VNC
Alright, we’ve covered the basics, but if you really want to take your Raspberry Pi VNC security to the next level, here are a few advanced tips:
- Use strong, unique passwords for your VNC and SSH access.
- Consider setting up two-factor authentication for added security.
- Regularly update your Raspberry Pi to ensure you have the latest security patches.
- Monitor your VNC logs for any suspicious activity.
By following these tips, you’ll be well on your way to creating a fortress of security around your Raspberry Pi VNC setup.
Understanding VNC Security Risks
Let’s talk about the elephant in the room—security risks. There are a few common threats you need to be aware of when setting up VNC on your Raspberry Pi:
- Brute Force Attacks: These are attempts by hackers to guess your password by trying every possible combination.
- Man-in-the-Middle Attacks: This is where an attacker intercepts your VNC traffic and can potentially gain access to your system.
- Unsecured Connections: If you’re not using encryption, your VNC traffic can be easily intercepted and read by anyone on the same network.
The good news is that by following the steps we’ve outlined, you can significantly reduce the risk of these threats.
Data and Statistics: Why Security Matters
Here are some eye-opening stats to drive home the importance of securing your Raspberry Pi VNC setup:
- Over 50% of cyberattacks target small businesses and individuals.
- In 2022 alone, there were over 236 million brute force attacks reported.
- Unsecured IoT devices, like Raspberry Pi, are one of the top targets for hackers.
These numbers should be a wake-up call for anyone who thinks they’re too small to be a target. The truth is, no one is immune to cyber threats, which is why taking security seriously is more important than ever.
Conclusion: Take Action Now
So, there you have it—everything you need to know about securing your Raspberry Pi VNC setup using host.allow. By following the steps we’ve outlined, you’ll be able to create a secure environment that keeps the bad guys out while allowing trusted users in.
Now, here’s the thing—knowledge is power, but action is what makes the difference. Don’t just sit there reading this article; go out and implement these steps on your Raspberry Pi. And while you’re at it, don’t forget to share this article with your friends and colleagues. The more people who know about Raspberry Pi secure VNC, the safer we all are.
So, what are you waiting for? Get out there and start securing your Raspberry Pi today!
Table of Contents
- What Exactly is Raspberry Pi Secure VNC?
- Why Should You Care About VNC host.allow?
- Step-by-Step Guide to Securing Your VNC Setup
- 1. Update Your Raspberry Pi
- 2. Install VNC Server
- 3. Configure VNC host.allow
- 4. Set Up SSH for Remote Access
- 5. Enable Firewalls
- Advanced Security Tips for Raspberry Pi VNC
- Understanding VNC Security Risks
- Data and Statistics: Why Security Matters
- Conclusion: Take Action Now